Your cart

Product Title
Option 1 / Option 2 / Option 3
Product Note
Subscription Plan Info
Product Discount (-$0)
COUPON1 (-$0)
$0
$0
-
+
Your cart is currently empty.
Enter discount code
Thank you! Your submission has been received!
Oops! Something went wrong while submitting the form.
Coupon1
Coupon2
Cart note
Subtotal
$0
COUPON2
-$0
Order Discount
-$0
Cart Total
$0

How to Make Sourdough Bread

Known for its tangy flavor, chewy texture and crispy crust, sourdough bread is naturally leavened. A fermented flour-and-water mixture includes lactobacilli and wild yeast, which makes the dough rise.
A dough ball being placed on a countertop from a bowl.

How to Make Sourdough Bread

Known for its tangy flavor, chewy texture and crispy crust, sourdough bread is naturally leavened. A fermented flour-and-water mixture includes lactobacilli and wild yeast, which makes the dough rise.

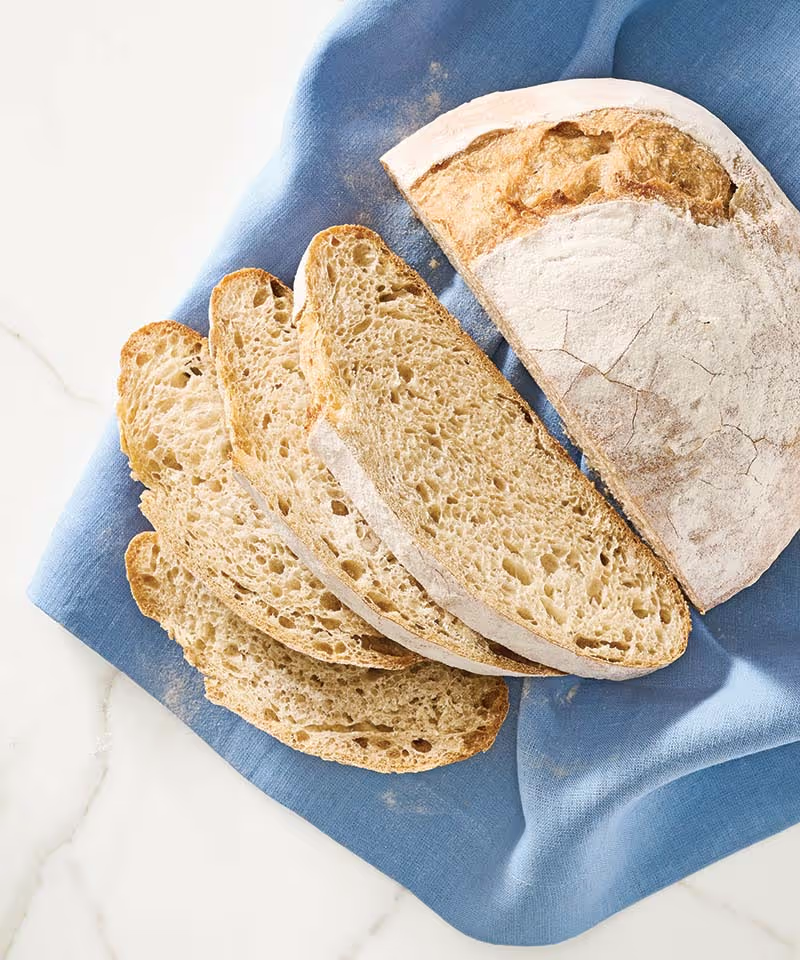
Sourdough is the oldest form of leavened bread; its history dates back thousands of years. The wonderful flavor of this artisan bread comes from a starter culture. A small amount of it, combined with ample flour and water, is all it takes to prompt dough to rise through fermentation. This transformative process yields a wealth of nutrients. Fermentation breaks down gluten and phytic acid present in the flour, enhancing its digestibility and making nutrients more bioavailable, resulting in a bread that not only delights the palate but also nourishes the body.

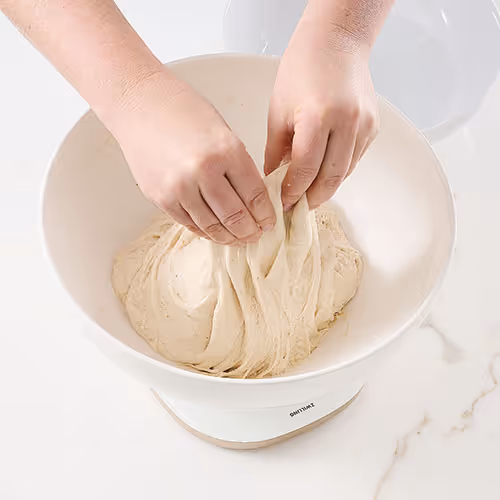
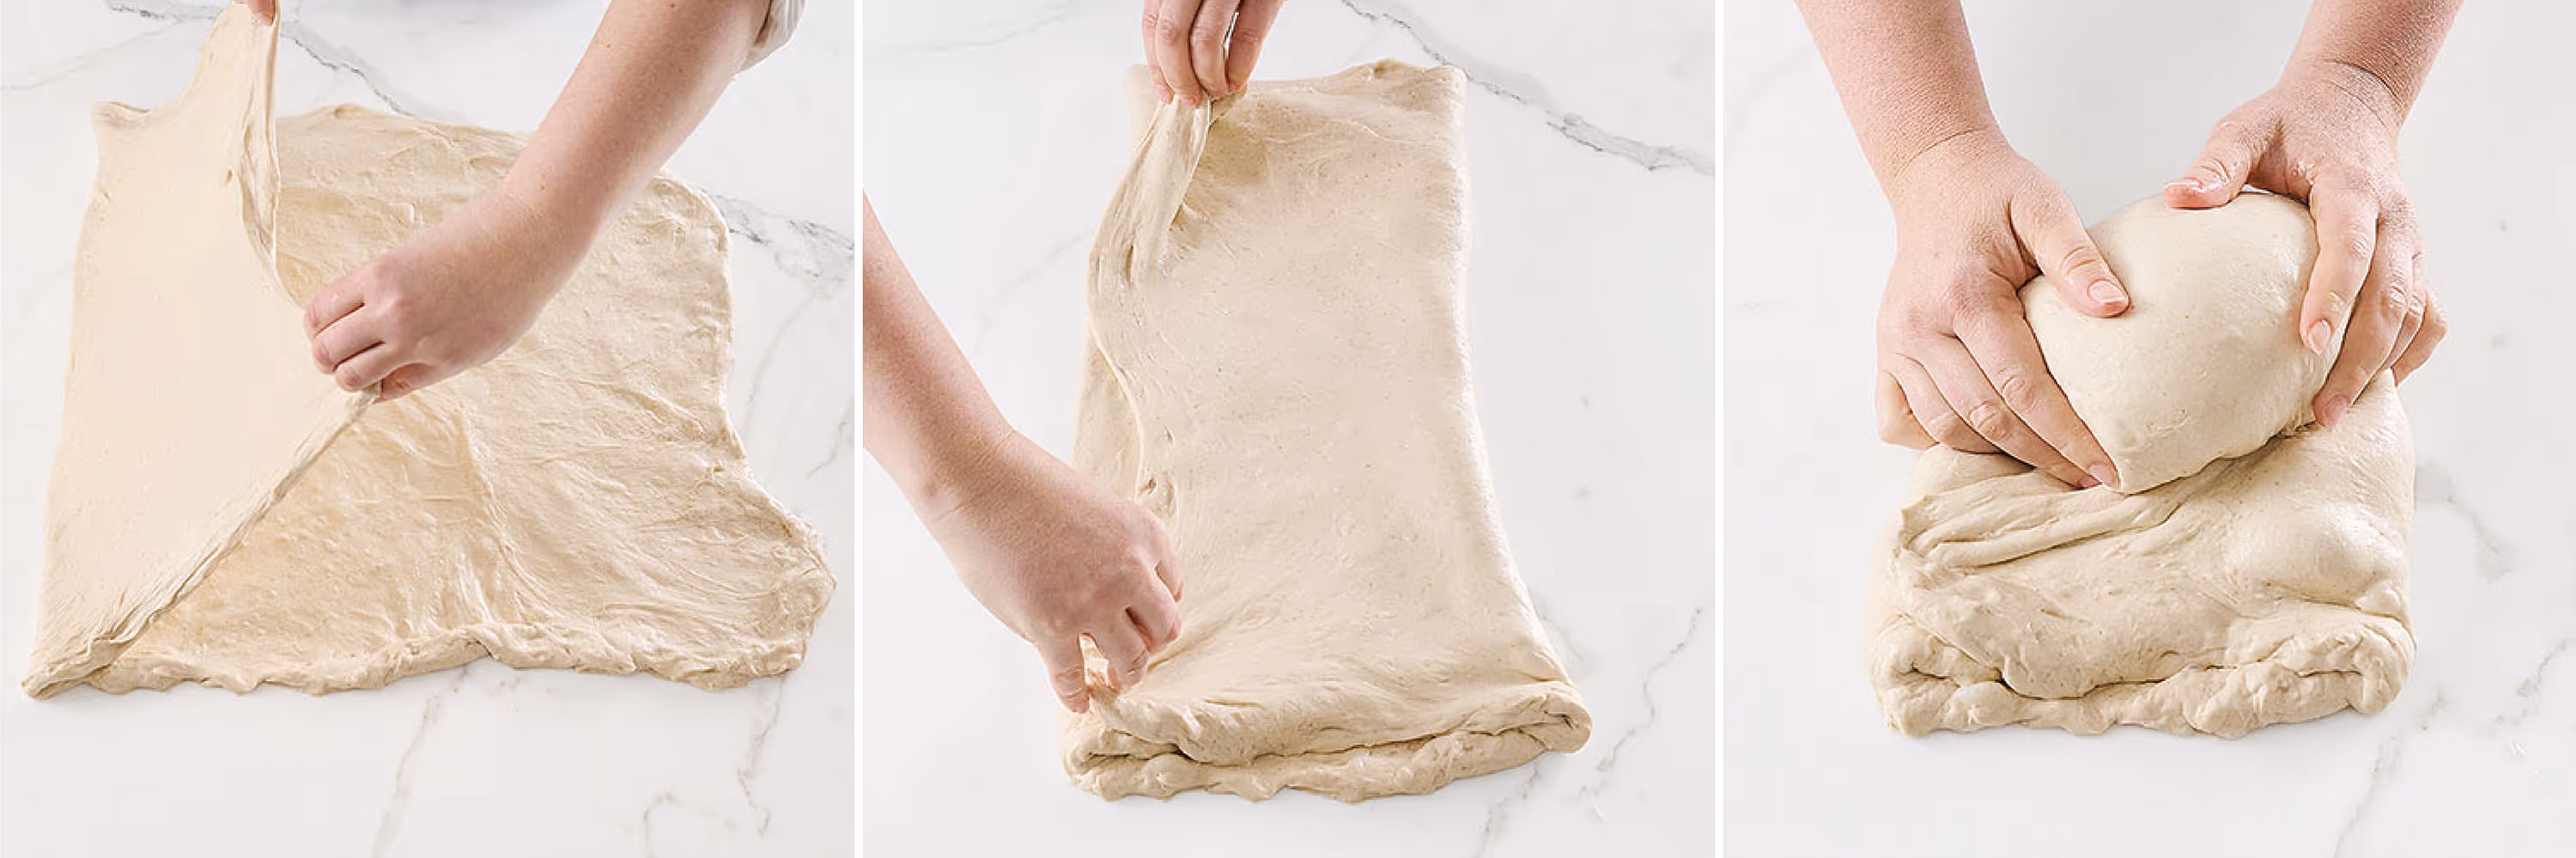
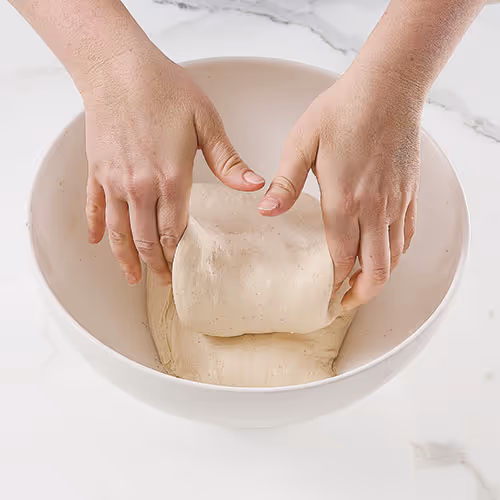
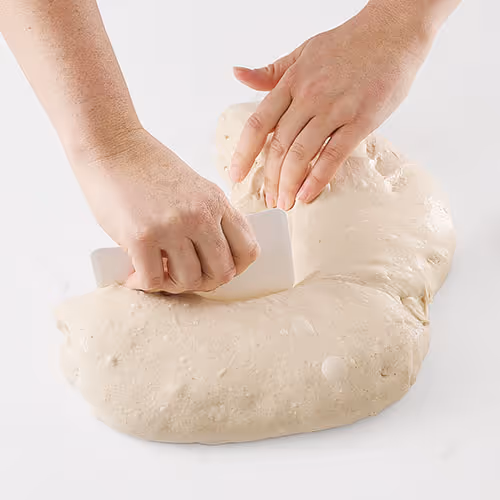
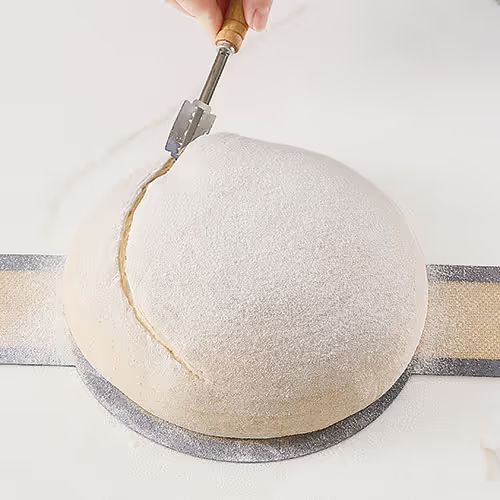
Making sourdough has regained popularity the last few years. The process of creating sourdough requires attention to detail, patience and a willingness to slow down. Savor each step and appreciate the journey from simple ingredients to a flavorful masterpiece. The most important ingredient is time for the starter to grow, the dough to rise, and the bread to cool. Slow down this summer and learn how to bake a beautiful loaf—immerse yourself in the therapeutic rhythm of folding and shaping.

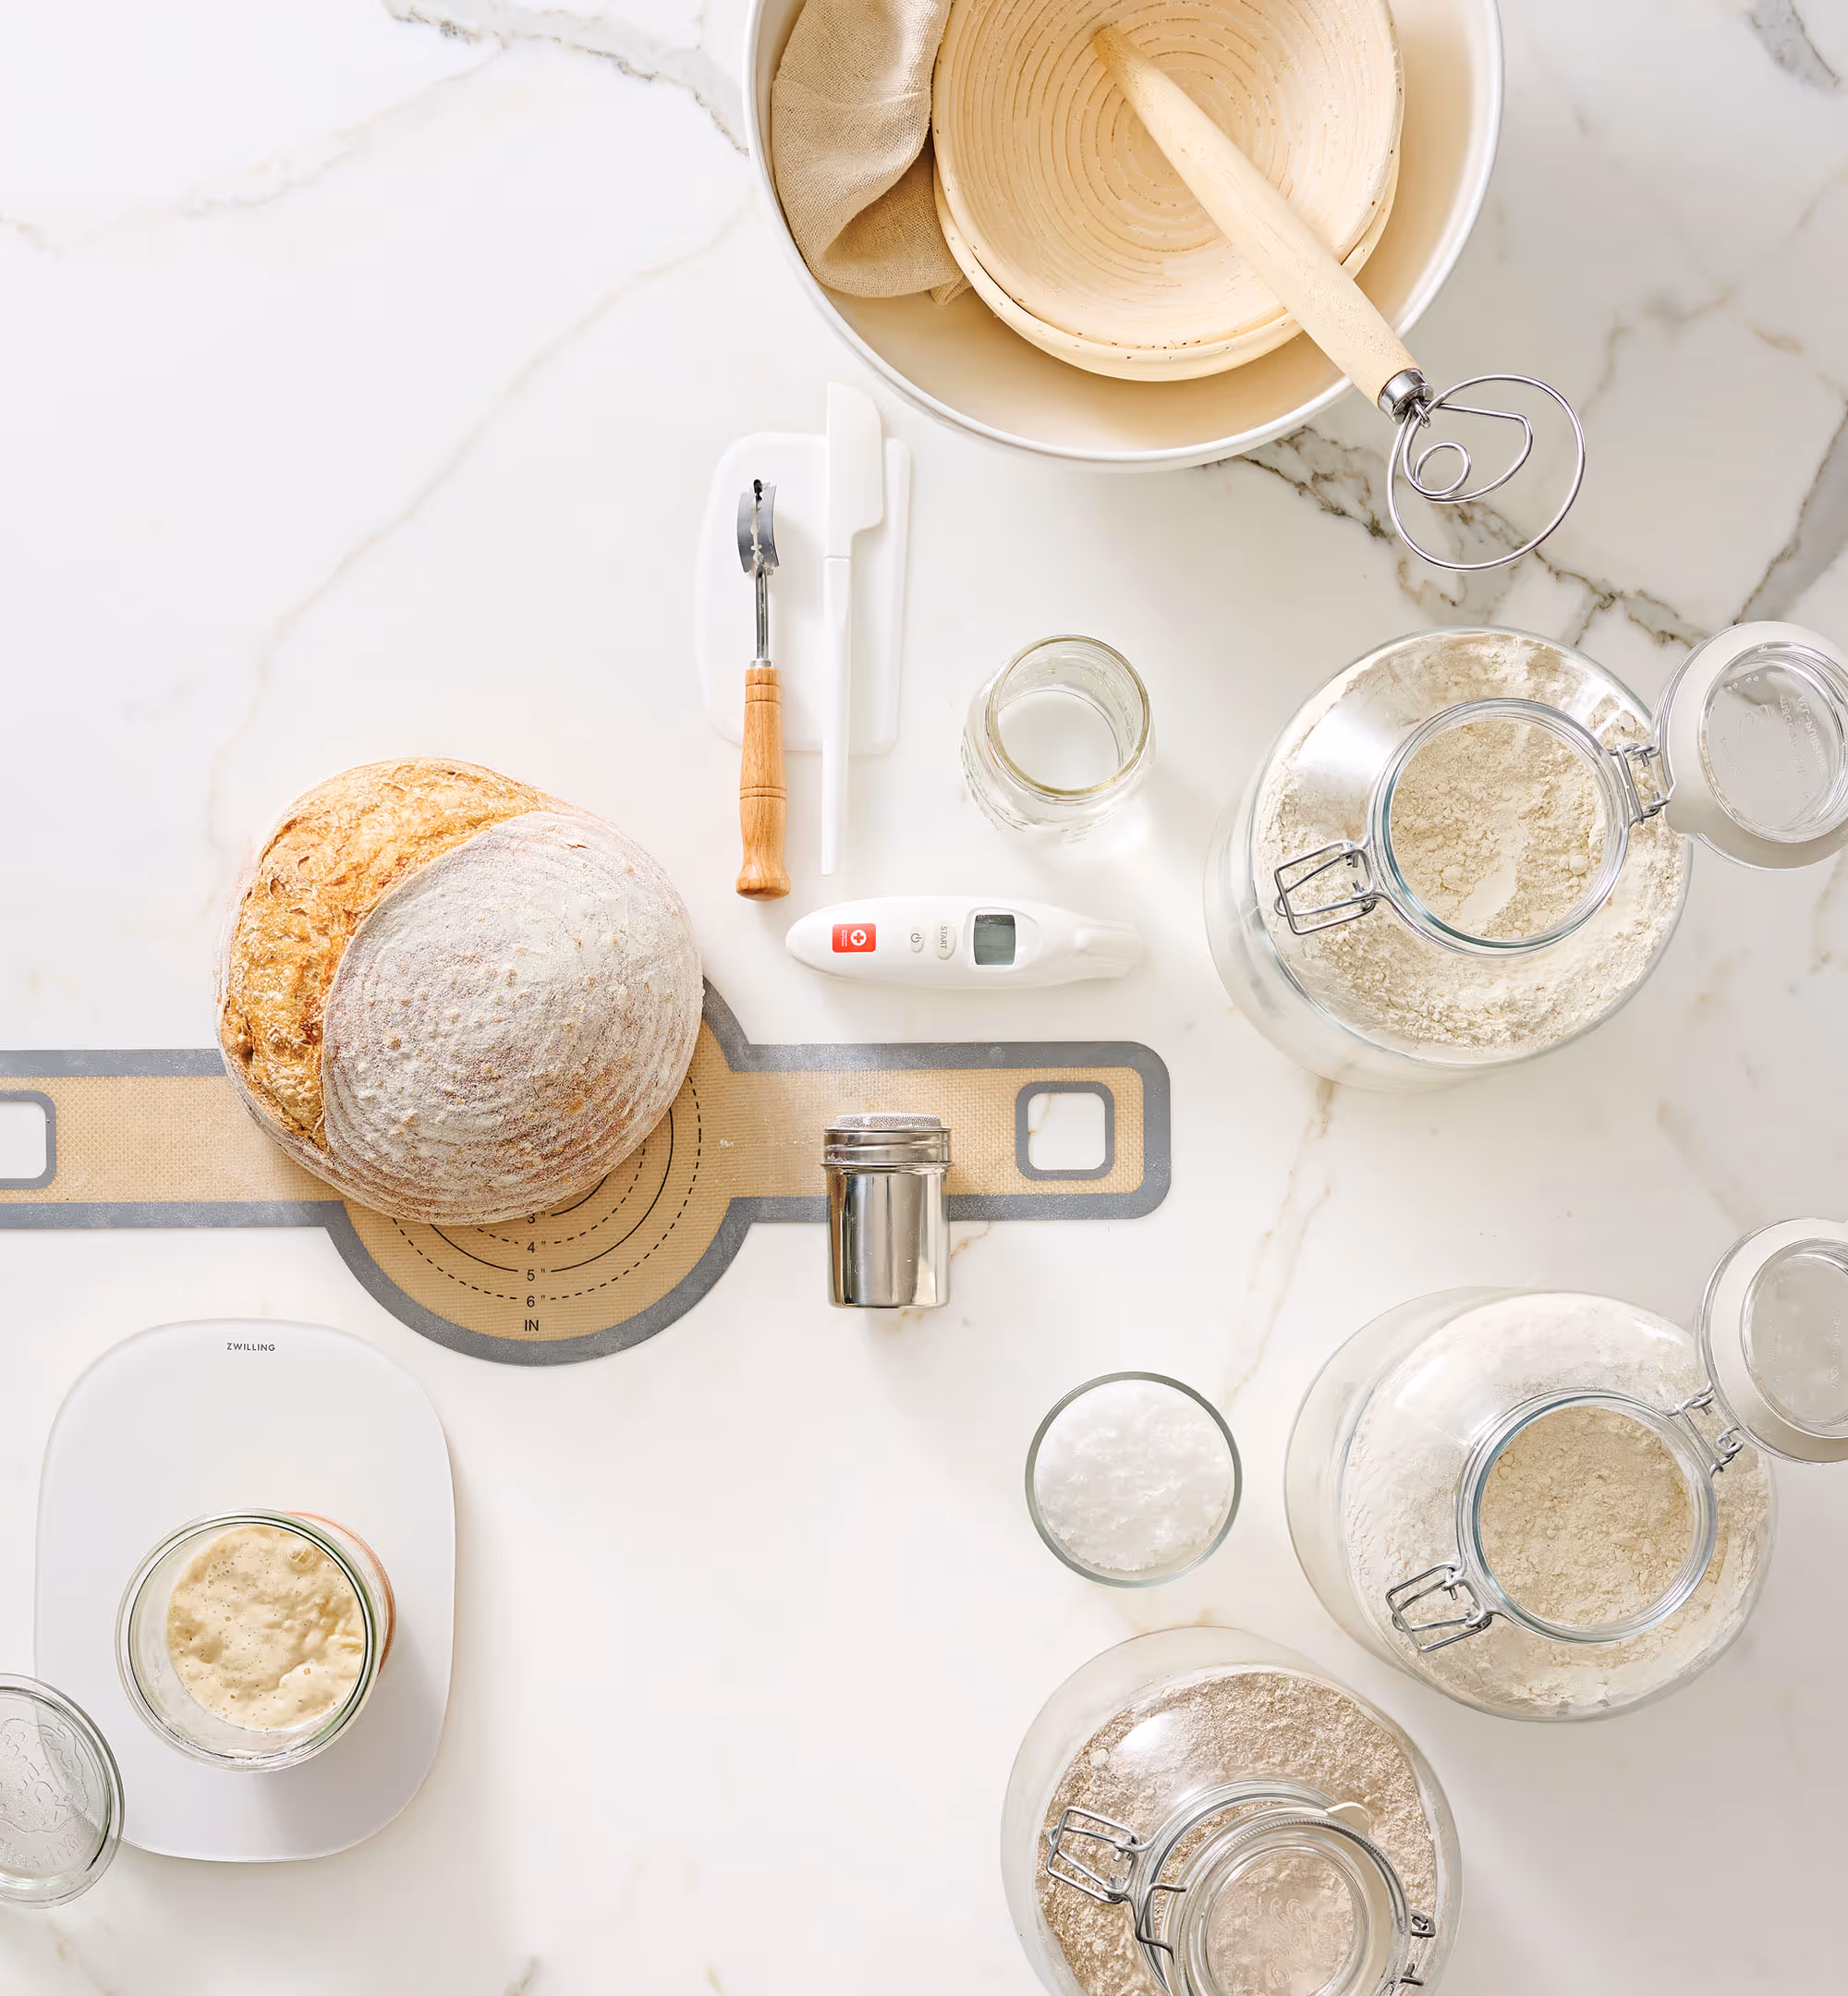
Starter & Levain 101:

Feeding the starter and building the levain are closely related steps in the bread-making process, but they serve slightly different purposes.

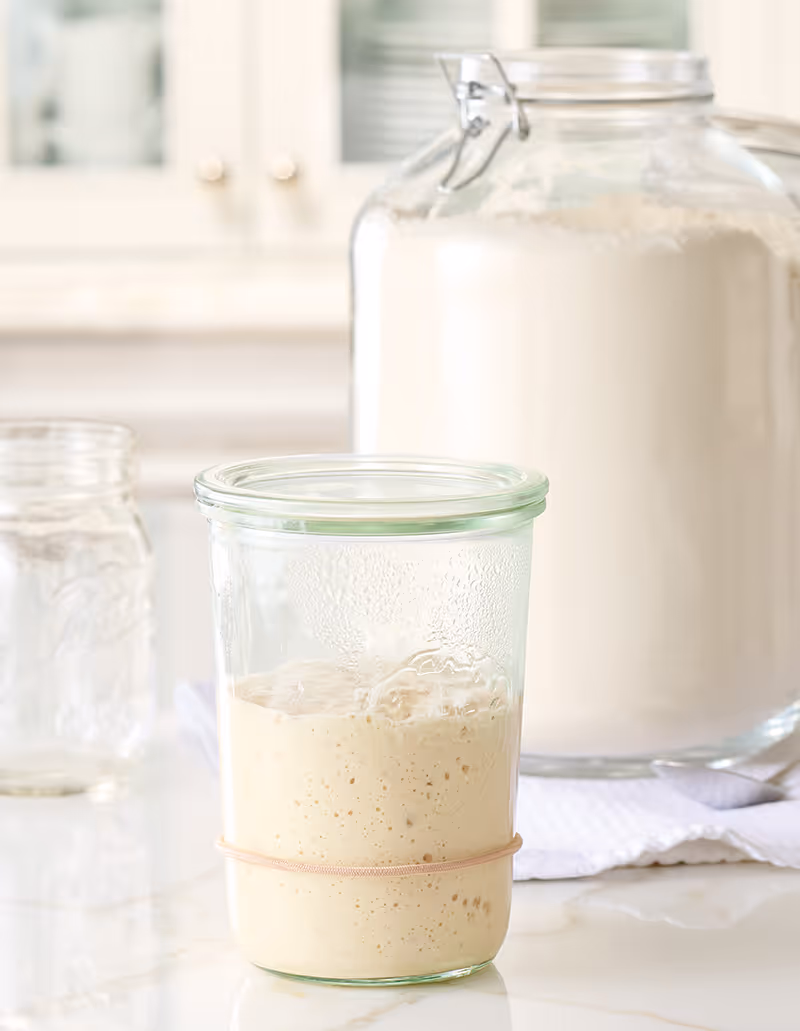
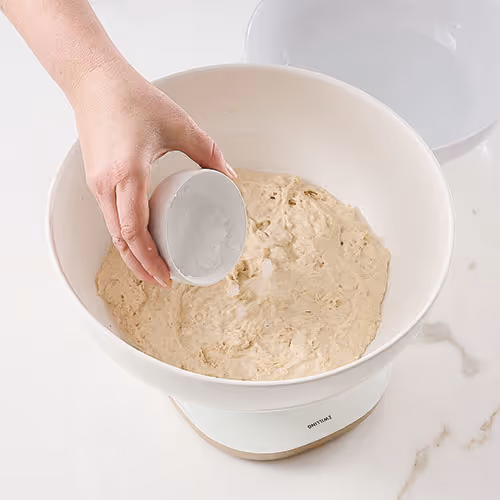
Feeding the starter is a regular maintenance task to keep it healthy and active between baking sessions. When you feed your starter, you discard a portion of it and refresh the remaining starter by feeding it with equal parts of flour and water. This helps replenish the yeast and bacteria in the starter, ensuring that it remains lively and ready for baking. Discard the unfed portion of sourdough starter that you remove before adding fresh flour and water. Because of its unfed state, it’s not used to bake the delicious bread but can be used in sourdough discard recipes like waffles, pancakes and cookies.

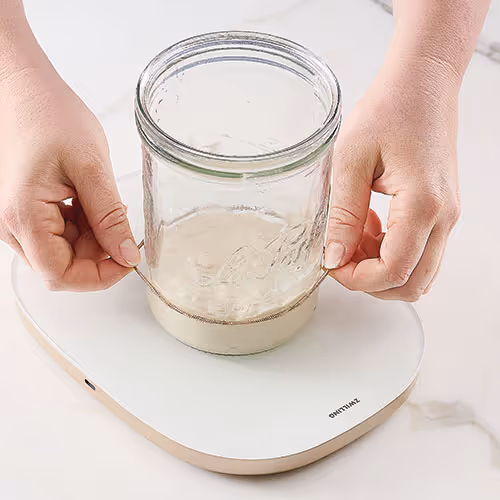
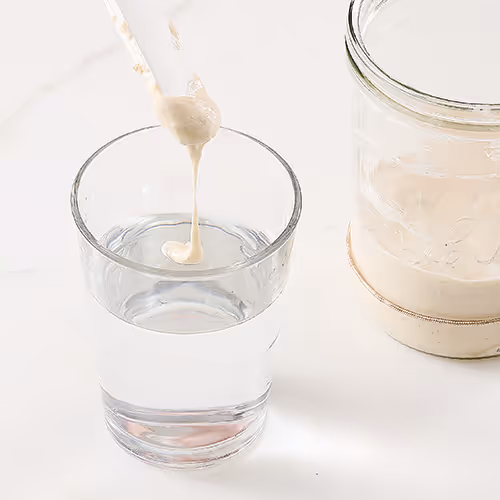
Building a levain refers to the process in which you take a portion of your starter and “feed” it an exact portion of fresh flour and water to yield the exact amount you need to make bread. By feeding the starter, you activate the bacteria and yeast in the flour. We use the levain to help our bread rise, just as you would use a packet of yeast. When the levain has doubled or tripled in size (reached peak), it is ready to use to make bread.

Sourdough Tools and Ingredients
Tools

Banneton: Shapes and supports the dough during the final rise.

Large Bowl: A variety of sizes is great to have when proofing the dough.

Dutch Dough Hook: Loops help incorporate ingredients without overworking.

Lame: Used for scoring before baking to allow for proper expansion.

Scraper: Useful to scrape the sides of your bowl or surface during the folding process.

Mini Spatula: Reduces sticking and waste when combining ingredients.

Thermometer: Check the temperature of water and dough to ensure optimal conditions for fermentation.

Bread Baking Mat: Safely transfer sourdough from Dutch ovens.

Flour Shaker: Use a fine-meshed sifter to dust the top of the dough lightly with rice flour.

Kitchen Scale: A digital scale helps ensure consistency and precision.

Starter Jar: A dedicated container for storing sourdough starter. Use a rubber band or hair tie to mark the height of the rise.

Ingredients

Organic All-purpose Flour: Used only to feed your maintenance starter.

Warm Water: 116°F is a good temperature to use to feed your starter and build your levain.

Organic Bread Flour: Unbleached high protein (12–14%) flour enhances the rise and quality of your loaves.

Organic Whole Wheat Flour: Adds vitamins, fiber and nutrients to the bread.

Salt: Any naturally dried sea salt works. We like the flaked Maldon Sea Salt.

Rice Flour: Dust the top of the dough lightly with rice flour before baking.

How to Make a Sourdough Starter

It takes 5–7 days for your starter to be ready to make bread. In a clean glass container, combine 50 grams of unbleached all-purpose flour with 50 grams of water until no dry flour remains. Cover loosely with a tea towel or glass lid and let sit on the counter for 2–3 days. Bubbles should begin to form on the top.

After 2–3 days, discard half of the mixture and refresh it with 50 grams of flour and 50 grams of water. Repeat this process of discarding half of the mixture and feeding with equal parts flour and water every 24 hours for about 5–7 days.

After about 1 week, you should notice that the starter rises several hours after being fed, then falls in between feedings. This means it is ready to use to make bread.

You can either maintain the starter at room temperature by feeding it daily or store it in the refrigerator and feed it once a week to keep it alive.

Note: You can skip this process by obtaining a dehydrated starter online or finding someone locally who will share a portion of an active starter.

Timeline for Making Sourdough Bread


Two Days Before Baking
10:00 am—Feed the starter
8:00 pm—Once starter has tripled/peaked, build the levain

The Day Before Baking
9:00 am—For dough, combine levain, water and both flours in the recipe
9:45 am—Add salt mixture and pinch in
10:15 am—1st fold; Stretch and fold
11:15 am—2nd fold; Coil fold
12:15 pm—3rd fold; Lamination
1:15 pm—4th fold; Coil fold
2:15 pm—Preshape dough. Divide into 2 loaves and shape each portion
2:35 pm—Final shaping and place in bannetons
2:50 pm— Stitch up dough and transfer bannetons to fridge for overnight cold proof.

Baking Day
8:00 am—Place Dutch oven into oven and preheat to 500°F.
8:45 am—Remove one banneton from fridge, flip dough onto parchment or bread mat, flour top of bread with rice flour and score top of loaf.
9:00 am—Place dough inside Dutch oven, cover and drop oven temperature to 480°F. Bake for 25 minutes.
9:25 am—Remove top of Dutch oven and bake for additional 10 minutes.
9:35 am—Lower oven temperature to 450°F; remove loaf from Dutch oven and bake directly on oven rack for another 5 to 15 minutes or until crust reaches desired color.
9:45 am—Remove loaf from oven and repeat process with other loaf (reheat oven to 500°F before starting the second loaf).

How to Make Sourdough Bread

Two Days Before Baking

1. To feed starter, take maintenance starter out of refrigerator. Place 20 grams of starter in a clean jar. What is remaining is now considered discard. Stir in 100 grams warm (116°F) water and 100 grams organic all-purpose flour. On the jar, place a marker or rubber band level with the top of the starter; loosely cover jar with plastic wrap or lid and wait 4 to 12 hours or until the starter triples in size. This creates an active starter.

2. To build the levain, place 20 grams of active starter in a clean jar; what is left is now your maintenance starter that you can put back in the fridge. Stir in 110 grams warm (116°F) water and 110 grams high-gluten bread flour. On the jar, place a marker or rubber band level with the top of the levain; loosely cover jar with plastic wrap or lid and wait 6 to 12 hours until levain has peaked (domed top) or has tripled in size.

Float Test


1. Take a small amount of the active levain and drop it into a glass of water.

2. If the levain floats on the water’s surface, it has trapped gas, a sign of fermentation. This means it’s likely ready for baking.

3. If the levain sinks to the bottom, it may need more time to ferment and develop before using for baking.

Note: The float test can be a helpful indicator, but it’s not the only factor to consider when determining the readiness of your sourdough starter or levain. It should have a tangy aroma and bubbly texture.

The Day Before Baking

1. For dough, pour 230 grams levain and 640 grams warm (116°F) water into a large bowl and stir until water is milky. Add 870 grams high-gluten bread flour and 50 grams organic whole wheat flour; stir with a Dutch dough hook or wooden spoon until combined. Dough will be loose and sticky. Cover with a clean, damp kitchen towel; let rest for 45 minutes.

2. Meanwhile, in a small bowl, stir together 2 tablespoons water and 20 grams salt. Pour salt mixture onto dough and pinch it in about 8 times or until salt is incorporated. Cover the bowl with a damp kitchen towel and let rest for 15 to 30 minutes.

Bulk Rise and Folds

1. 1st fold–Stretch and fold dough. With wet hands, lift one side of dough, stretch the dough up and fold it toward the middle of the dough. Repeat four times, rotating the bowl as you stretch the dough up and toward the middle. Cover dough and let rest 45 to 60 minutes.

2. 2nd fold–Coil fold. With wet hands, reach under the dough on both sides and lift dough in the center; gently pull up, allowing the dough to unstick and fold onto itself. Rotate the bowl and repeat three more times. Cover dough and let rest for 30 to 60 minutes.

More

Baking

Stories

Read more

3. 3rd fold–Lamination. Turn dough out onto a clean, damp surface. From the center, gently stretch and pull the dough into a large rectangle, taking time to prevent the dough from tearing. Fold dough into thirds. Starting at the short end, roll dough into a ball. Place dough back into the bowl; cover and let rest for 30 to 60 minutes.

4. 4th fold–Coil fold. With wet hands, reach under the dough on both sides and lift dough in the center; gently pull up, allowing the dough to unstick and fold onto itself. Rotate the bowl and repeat three more times. Cover dough and let rest for 30 to 60 minutes.

5. Preshaping–Turn dough out onto a surface lightly dusted with rice flour. With a bench scraper, divide dough into two equal portions.

6. Carefully shape each one into a round by dragging your hands on the work surface and tucking the dough under itself; you want to build tension as you shape. Rest the dough, uncovered on the counter, for 15 to 20 minutes. Meanwhile, dust proofing baskets, or bannetons, slightly and evenly with white rice flour.

7. Final Shaping–Once dough has rested, using the bench scraper, flip over the dough so it sits seam side up. This will be the bottom of your loaf. Gently stretch out the dough into a small oval. Fold the left side back toward the middle. Fold the right side toward the middle. Fold the top down, then roll up the dough. Pull the dough toward you, building tension. Once each loaf is round and taut, place it seam side up in a prepared proofing basket, or banneton. Let dough rest, uncovered, for 10 to 15 minutes.

8. Stitch the dough, taking pieces and pulling them into the middle of the dough. Cover dough with proofing basket liner or clean tea towel. Place dough in the refrigerator to cold-proof for 12 to 48 hours. Dough will not rise.

Baking Day

1. Place a Dutch oven with lid on an oven rack in the bottom third of the oven; preheat oven to 500°F for 30 to 60 minutes.

2. Once oven is preheated, remove one proofing basket from the refrigerator. Uncover dough and dust it with rice flour. Flip dough out onto a silicone bread sling or parchment paper. Heavily dust top of dough with rice flour.

3. Use a bread lame to score dough. Starting at a top side, score dough in a crescent shape, about ¼ inch deep and at a 45-degree angle, ending near the bottom of loaf.

4. Reduce oven temperature to 480°F. Carefully remove lid and place dough in the Dutch oven. Cover and bake for 25 minutes.

5. Remove lid and continue baking for 10 minutes.

6. Reduce temperature to 450°F. Remove bread from Dutch oven and bake directly on oven rack for 5 to 10 minutes or until bread reaches desired color.

7. Remove from oven, cool completely, 3 to 4 hours. Repeat with other loaf.

3 Ways to Use Sourdough Bread
Sourdough Bread Pudding

Day-old sourdough chunks soak in a creamy custard base and bake until tender. It’s a delicious breakfast or dessert that’s topped with fresh berries, powdered sugar and mint.

View recipe

Sourdough French Toast with Caramelized Peaches

Dense sourdough slabs resist sogginess, ensuring this French toast retains its structure and texture. Top with whipped cream, maple-caramel syrup, caramelized peaches, raspberries and slivered almonds.

View recipe

Summer Sourdough Panzanella

Sourdough cubes mix with heirloom tomatoes, cucumbers, shallots and fresh herbs. Each forkful is a medley of textures and tastes, enhanced by a light champagne vinaigrette.

View recipe

More

Food

Stories

Read more

Related Categories